- May 28
Using Gelli Prints to Make a Scrapbook Page
- Creative Journaling
- 0 comments
I bought a gelli plate on a whim.
That seems to be how many creative tools enter my life. I see something interesting, I imagine all the possibilities, and then, once I actually sit down with it, my brain immediately starts asking questions like, "Am I doing this right?" Why doesn’t this look better? Is this supposed to happen?
That was pretty much my first experience with gelli printing.
I played with the plate a little, made some prints, and didn’t love the results. I would not call them bad exactly, but they did not match whatever picture I had in my head. Then I took a gelli plate workshop at Craftcation, thinking maybe I just needed someone to explain the technique more clearly.
The teacher was good. The student, on the other hand…
So I decided to try again, but with a different goal.
For this experiment, I wanted to make a page about a recent Mah Jong class I took. I had a couple of photos from the class, and I wanted the gelli prints to become part of the background and layering material for the page.
The Experiment
The experiment was simple:
Could I use the gelli plate as the way into a scrapbook page?
Before building the page, I tested various gel printing techniques: basic color pulls, stamps, stencils, die-cut shapes, layering, and image transfer. I wanted to see what kinds of papers I could create and how they might work in a scrapbook or creative journal.
This was the creative on-ramp part. The prints did not need to become finished artwork. They just needed to give me a place to start.
That shift helped.
Instead of judging every pull, I started looking at the prints as raw material that could become a background, photo mat, tag, journaling spot, or piece of handmade ephemera.
That made the experiment more useful for memory keeping.
Supplies Used
For this experiment, I used the Vicki Boutin Gel Print Starter Kit, which includes:
gelli plate
brayer
stencils
comb
die cut shapes
cardstock
paint
The kit is helpful because it provides plenty of materials to start experimenting with gelli plate printing right away. I like that part of it. You can open the box and have enough to experiment without needing to gather a bunch of separate supplies.
That said, I did not love everything in the kit.
The paint that came with the kit felt watery, and I did not get the results I wanted. I retried it later during the experiment, but I still preferred the prints I got from a different acrylic paint. For beginners looking for an easier, more satisfying starting point, I recommend DecoArt Americana Premium Acrylic Paint or Liquitex Basics Acrylic Paint. These both gave me stronger color and smoother pulls on the gelli plate. If you're looking for a better brayer, the Speedball Soft Rubber Brayer (4 inch) worked much better for me than the one in the kit. These small upgrades can help reduce frustration and set you up for more successful prints right from the start.
The paint I ended up using was DecoArt Americana Premium Acrylic Paint. It gave me stronger results, but it is thicker and dries quickly, so I had to move fast. That was especially true when I was layering or trying to create a more “scene” effect with stencils and shapes.
Technique Notes
Basic Prints with One or Two Colors
The basic prints worked well, especially with one or two colors. I tried an ombré effect with multiple colors and liked the general idea, though I did get some streaking from the brayer.
That may have been the brayer, the paint, my technique, or all of the above. This is one of those things I would need to keep practicing.
Still, as a starting point, the basic color pulls were useful. Even the imperfect ones could work as background papers or layering pieces.
Stamps
The clear stamps did not work as well as I hoped.
I think the DecoArt Americana Premium Acrylic Paint may have been too thick for the stamps, because the impressions came out muddled. I could see the idea, but I didn't get the clean, stamped texture I'd hoped for.
I would try this again with a thinner paint or with different stamps to see if I get better results.
Stencils
The stencil results were okay. I did not immediately love them as finished prints, but I do think I can salvage them by turning them into something else.
That is one of the things I’m learning with gel printing: a print may not look exciting as a full sheet, but it might work beautifully once it is cut down, layered, torn, or used as part of another page.
One practical note: if you use a 6x6 stencil on 8.5x11 paper, the stencil's edges may show up in the print. Next time, I would either trim the paper down, use a larger stencil, or be more intentional about where the stencil edges fall.
Die Cut Shapes
Using die-cut shapes felt similar to using stencils. The results were okay, but not necessarily something I would use as-is.
I still think this technique has potential, especially for creating abstract backgrounds, handmade collage papers, or pieces that can be cut apart later.
I want to practice more with using stencils and die cuts to create little scenes or layered compositions, because I can see how that could become interesting for journal pages.
Layering
Layering was probably the technique that worked best for me.
The process I used was:
Add paint to the plate.
Place objects, stencils, or die cuts into the paint.
Pull a print.
Add a different color of paint to the plate.
Add more objects or shapes.
Place the original print back on the plate to pick up another layer.
This gave me the most interesting results.
I also found that it helped to put the darker color down first and then use a lighter color for the second pass. That gave the layered image more visibility and contrast.
This is a technique I would definitely try again.
Image Transfer
Image transfer was the technique I most wanted to try for the actual Mah Jong page.
I used one of my photos from the class, printed it on a laser printer, and transferred it onto the gelli plate. My first attempt did not work well, so I had to adjust the image and try again.
What helped was converting the image to black and white, inverting it, and increasing the contrast so there was much more black. The laser print matters because the toner from a laser printer works better with acrylic paint than an inkjet print.
My second attempt was better, but I still need more practice with this technique.
I like the look of image transfer, especially for memory keeping, because it creates a layered, imperfect, almost ghosted image, more like embedding the memory into the background.
For this page, I used the laser transfer as part of the background, then added the actual photo on top.
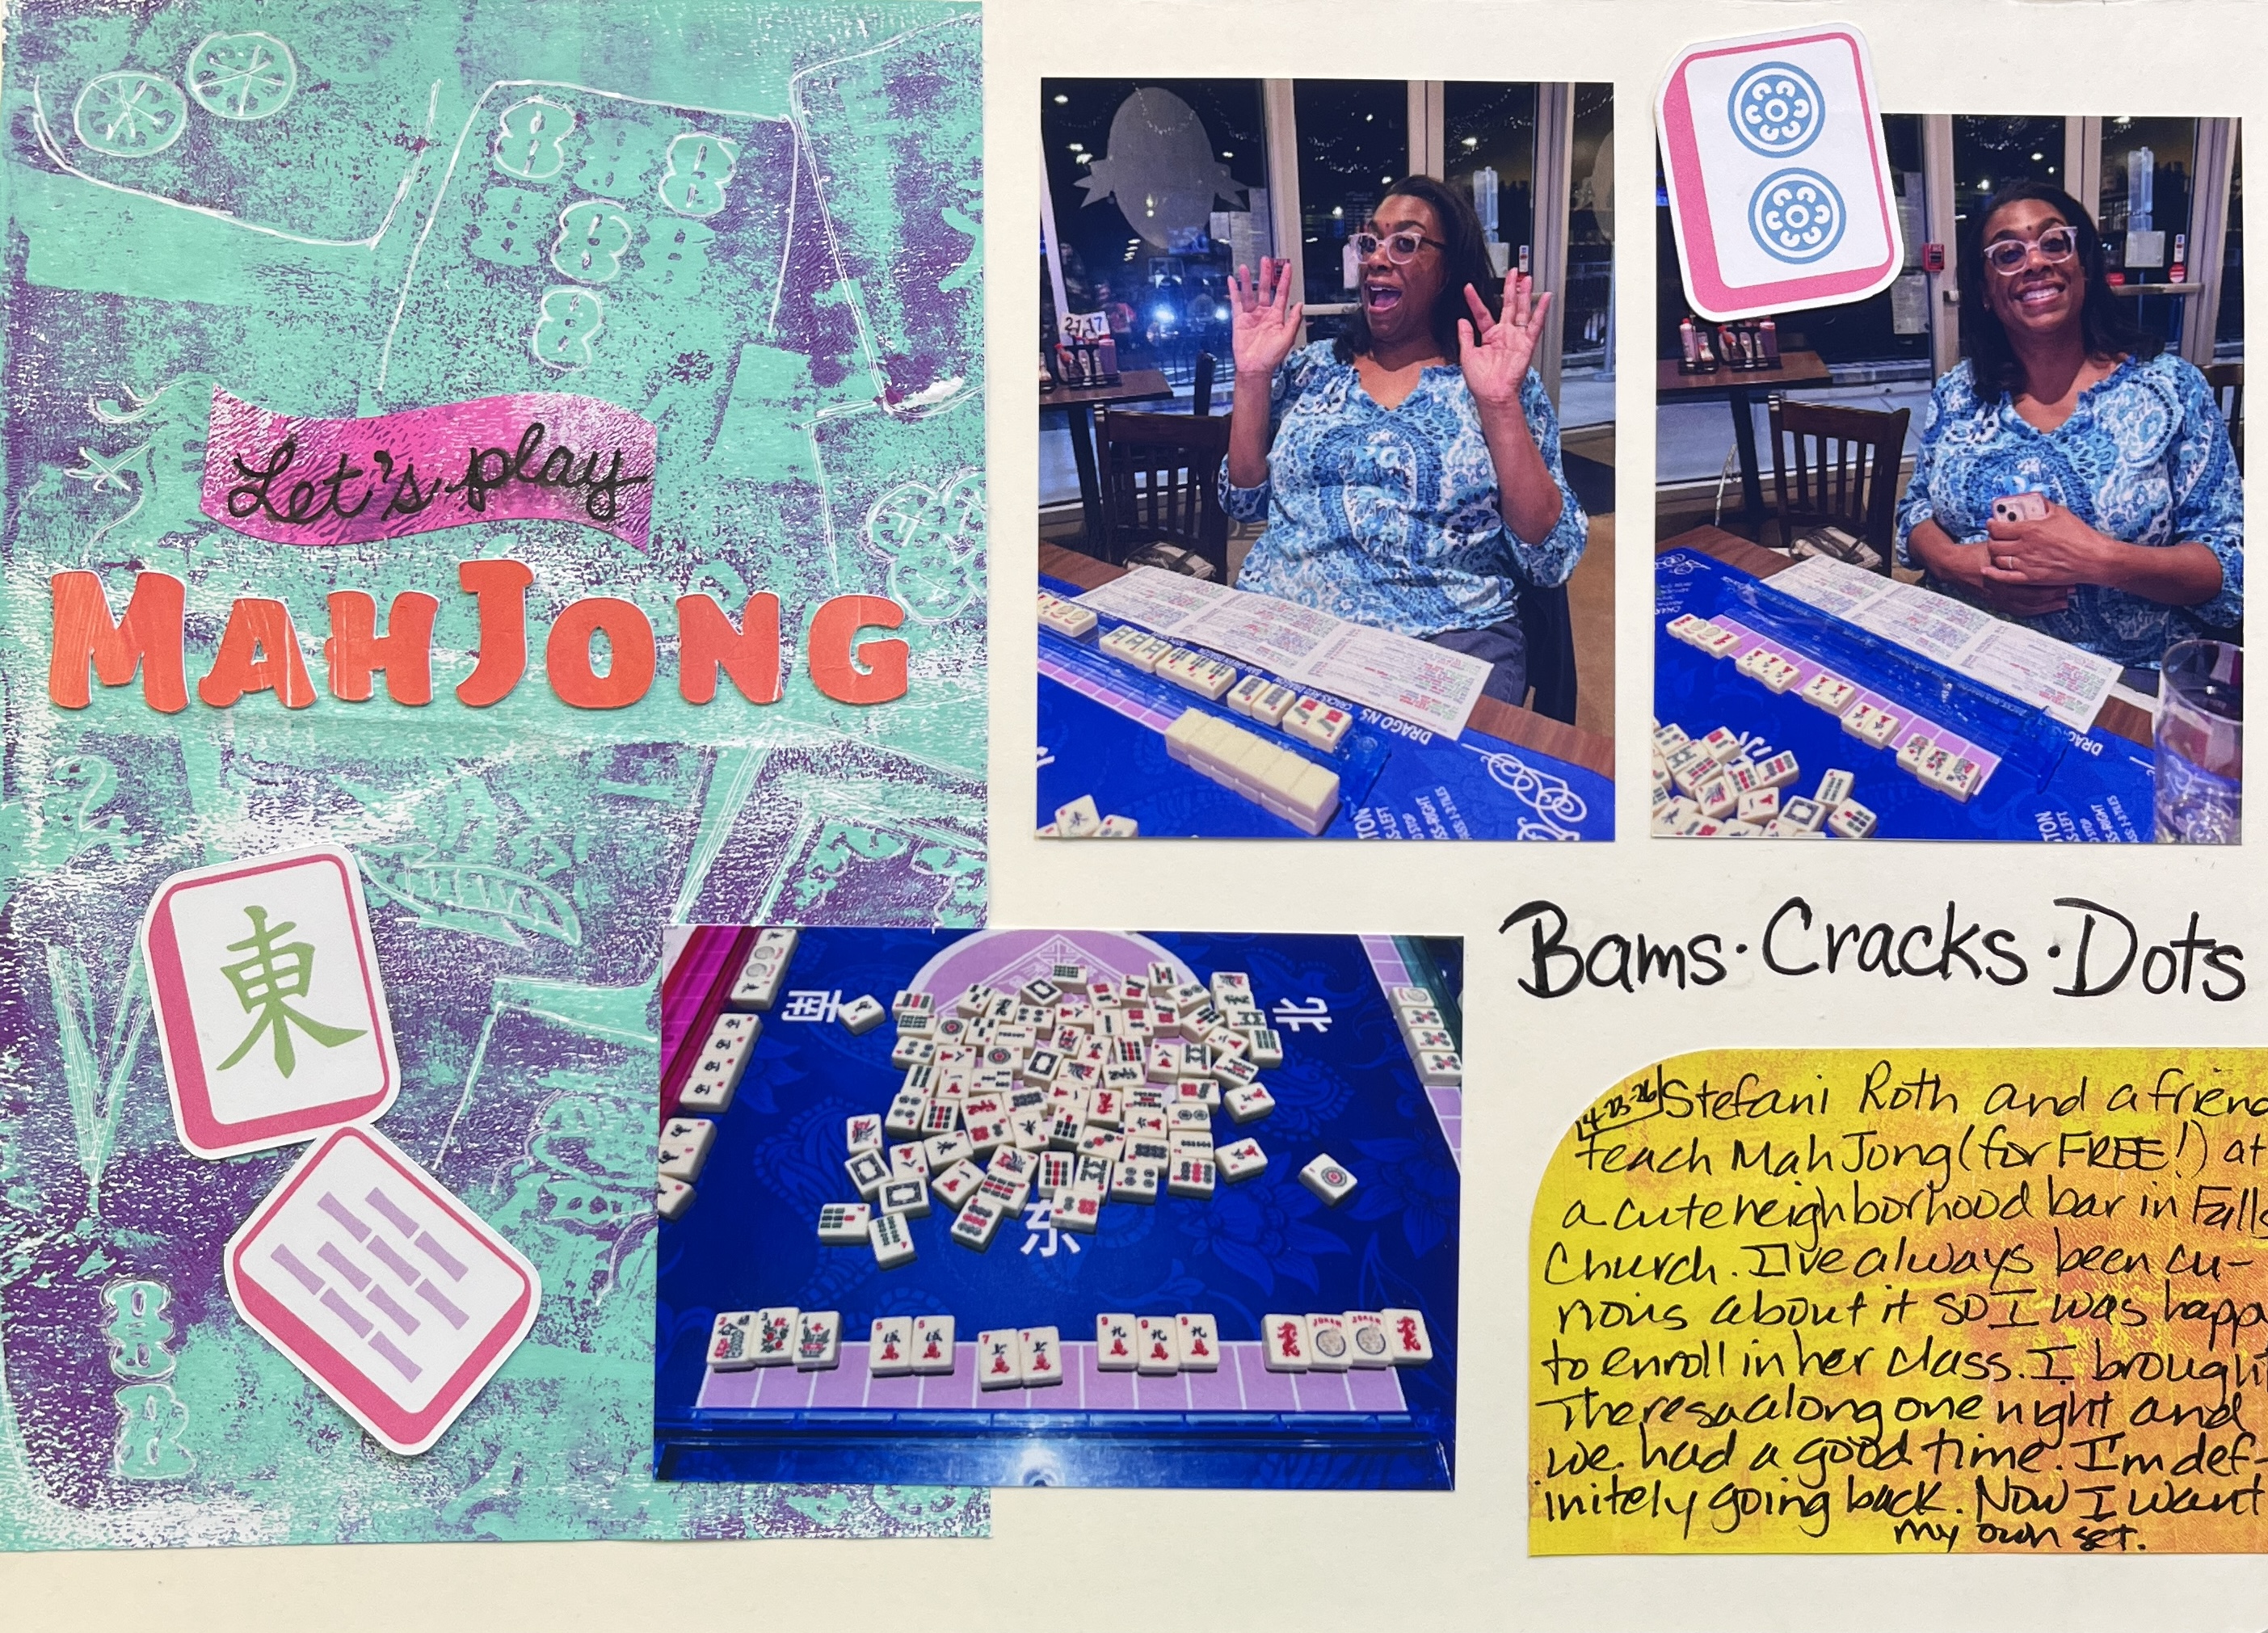
I would like to try this again with magazine images as well.
Cleaning the Plate
One thing I learned is that you do not have to clean the plate between every pull. The remaining paint from previous pulls can create interesting effects.
Because I wanted more pure color for some of these experiments, I cleaned the plate with a baby wipe between pulls. But if I were making more layered or grungy prints, I would probably leave more of the old paint on the plate and let it build up.
What Worked
The biggest thing that worked was changing how I thought about the prints.
Expecting each print to stand alone was disappointing; seeing them as raw material made them more useful.
Layering worked well, and the basic color pulls gave me usable papers. Even some less successful prints could be cut down or used in smaller pieces.
That feels very useful for journaling and scrapbooking.
A full sheet may look like too much. A small piece might be exactly what the page needs.
What Didn’t Work
A few things still felt awkward.
The paint dried quickly, so I had to move faster than I expected. That was especially true with layering and image transfer. If I took too long deciding where to place something, the paint started drying before I was ready.
The stamps did not give me the clean impression I wanted. The stencils and die cuts were hit-or-miss. The brayer created some streaking. Image transfer took more preparation than I expected.
And, of course, gel printing is messy.
That does not mean I disliked it. But this is probably a technique I would use when I am in the mood to get messy and clean up afterward. I do not see myself pulling out the gelli plate every time I sit down to journal.
What I’d Try Next
There are a few things I would try differently next time:
Use fewer colors at once.
Try for more contrast between layers.
Experiment with thinning the Americana paint slightly with water.
Test a different acrylic paint to see if I get more working time.
Use a different brayer.
Trim paper when using smaller stencils.
Practice more with layering stencils and die cuts into scene-like compositions.
Make the image transfer photo even more high contrast.
Try image transfer with magazine images.
Let the plate stay a little messier between pulls to see what textures build up.
I also want to practice using the prints in smaller pieces. Sometimes the full print is not the point. The print may work better as a tag, a strip, a photo mat, or a small piece of ephemera.
How This Works for Scrapbookers, Creative Journalers, and Memory Keepers
I can see several ways to use gelli prints in a journal or scrapbook:
DIY patterned paper
background pages
layering papers
photo mats
tag bases
journaling spots
hidden journaling pieces
collage scraps
borders
handmade ephemera
first-layer pages when you do not want to start with blank paper
Prints don’t need to be perfect or beautiful as full sheets—they can simply serve as raw material for the page.
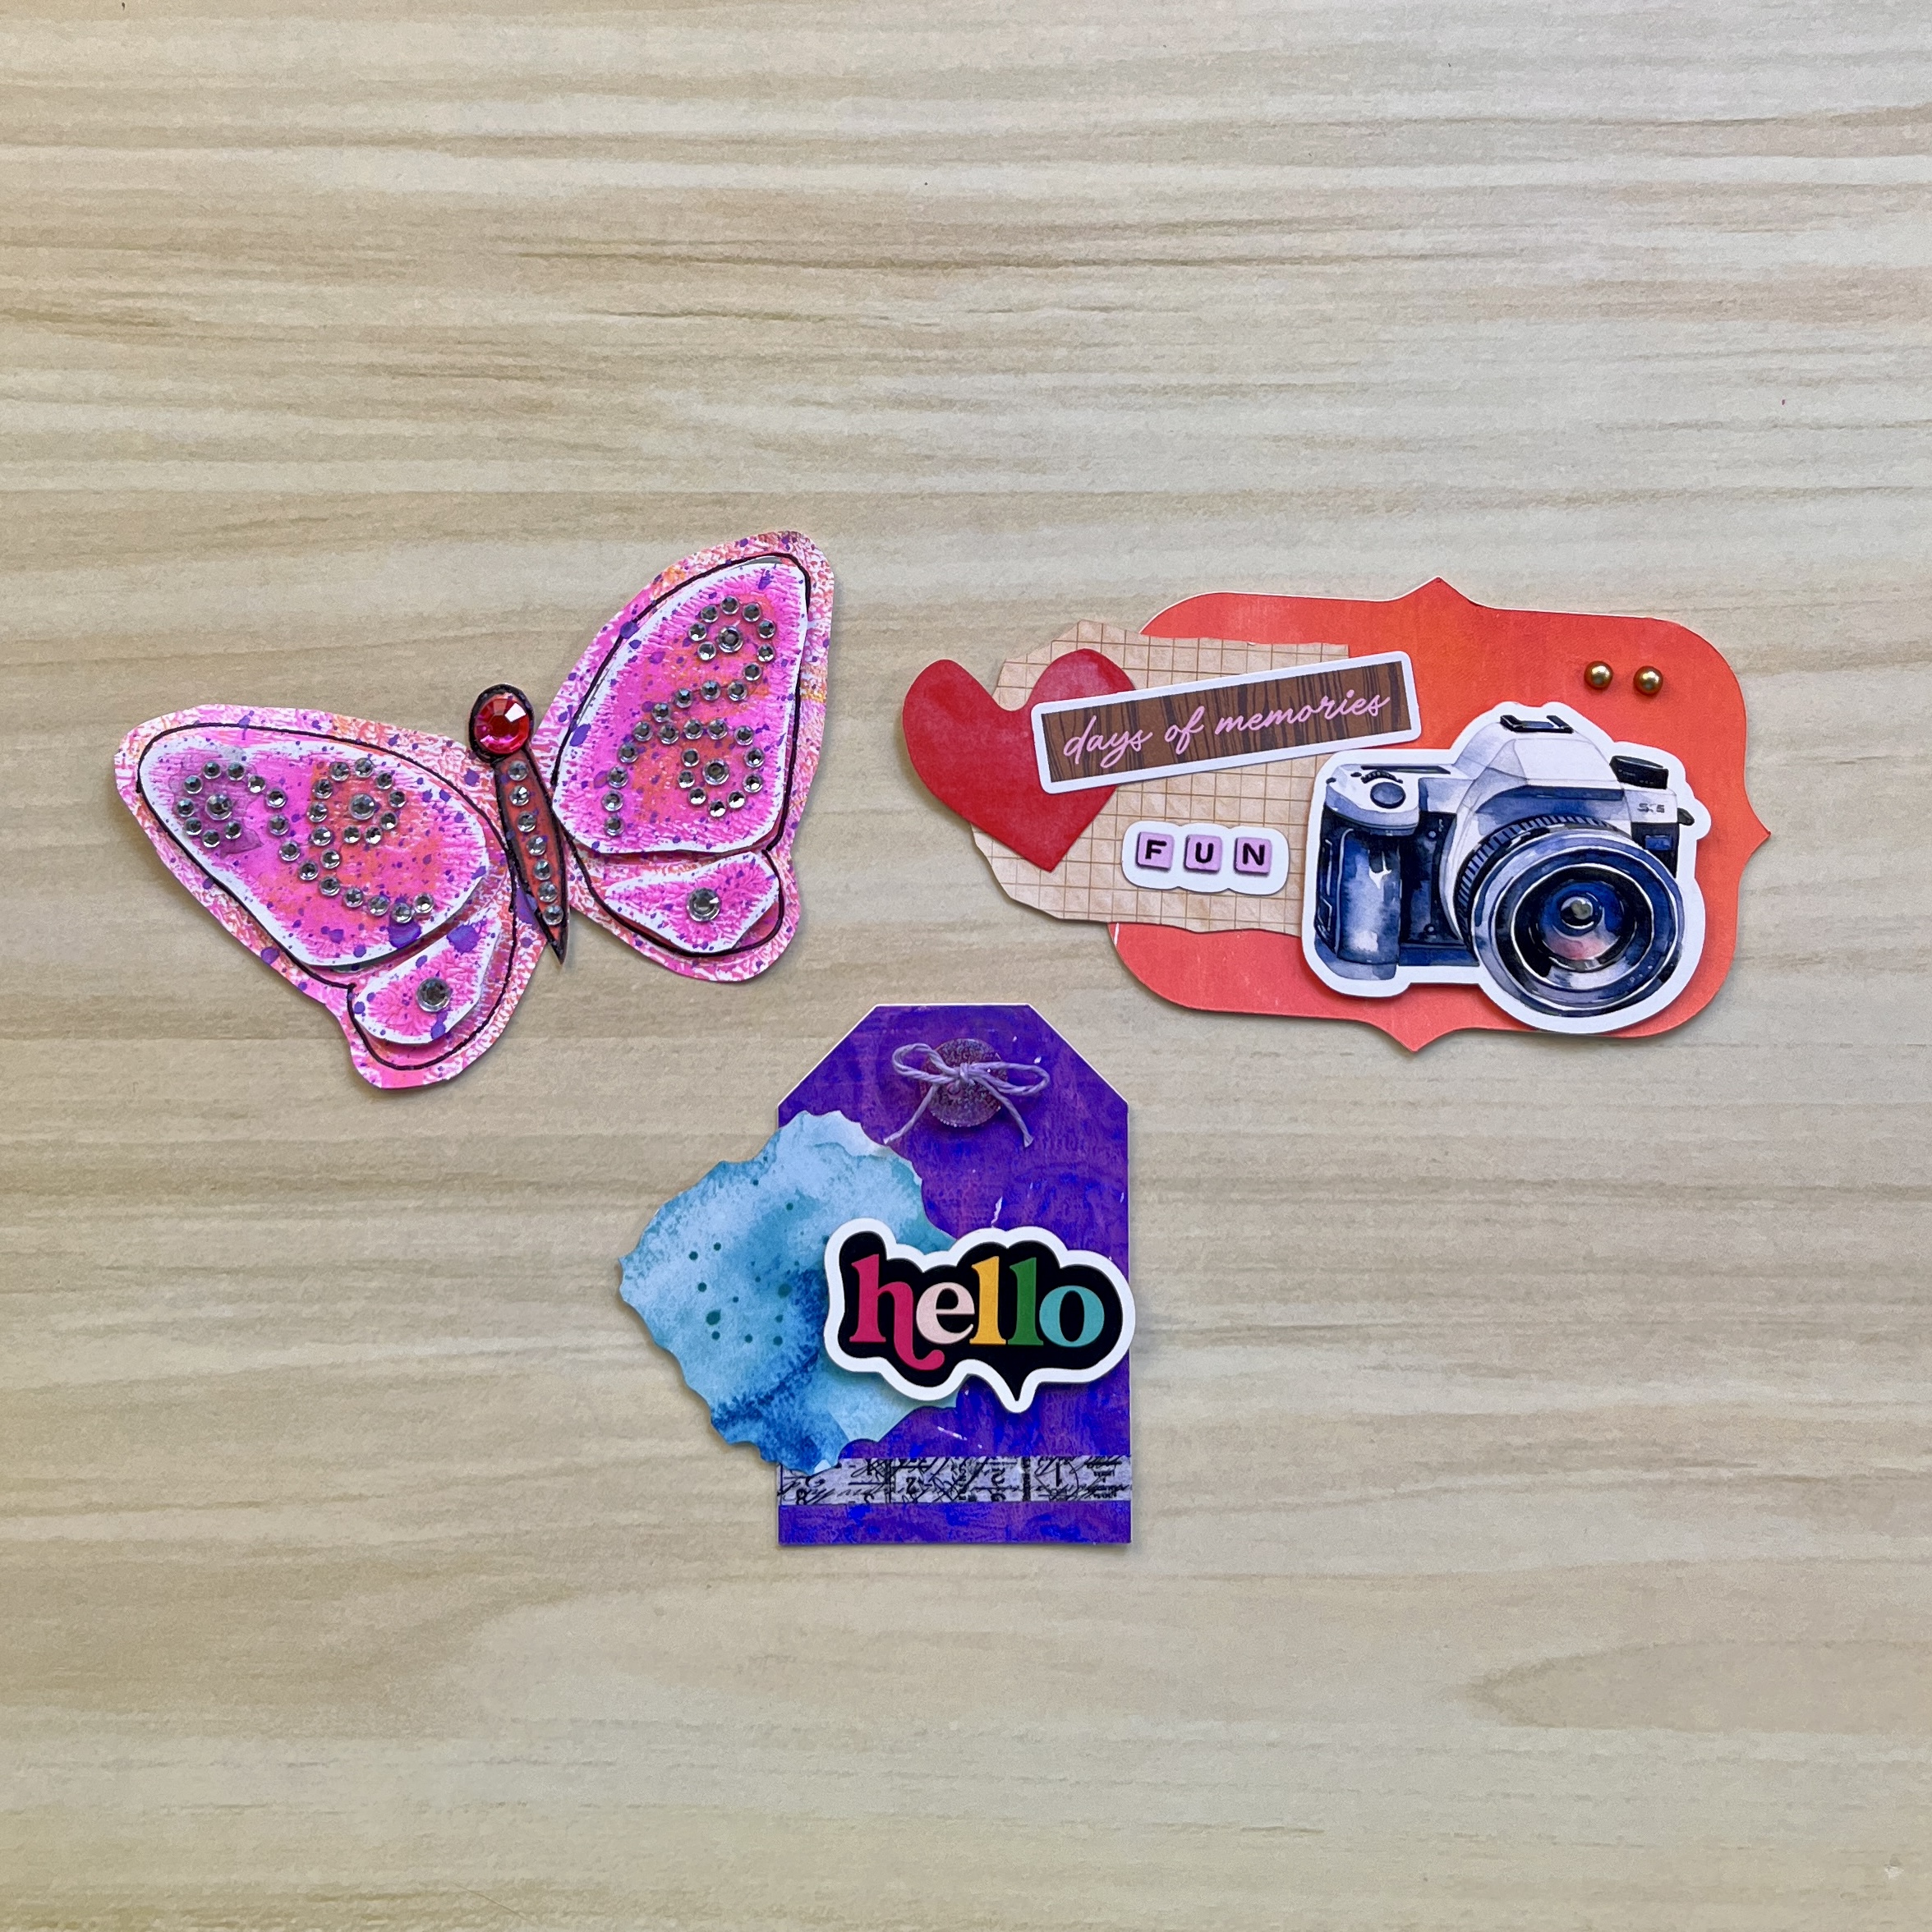
That is probably the biggest connection I see between gel printing and memory keeping.
You are not limited to using the print exactly as it came off the plate. You can cut it, tear it, layer it, write on it, cover part of it, or use one small section that catches your eye.
Final Thoughts
I do feel like I am getting better with gel printing.
I still have a lot to practice, especially with image transfer, stencils, and creating more intentional layered scenes. I also need to figure out the paint situation, because the Americana paint gave me better results, but dried faster than I wanted.
Would I do this regularly? Possibly.
It is messy, and I would need to be in the mood for the cleanup. But as a creative on-ramp, it worked. It got me out of my head and onto the page.
And sometimes that is enough to get the page started.
Have you tried gelli plate printing? What were your results?